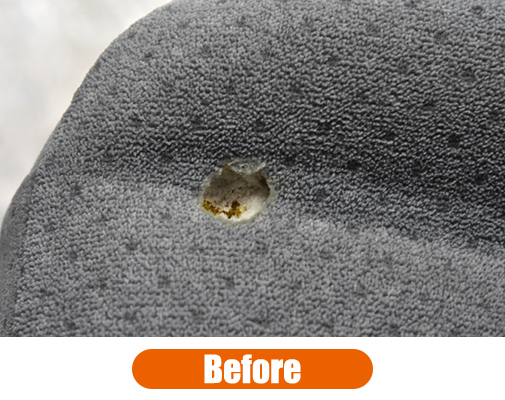
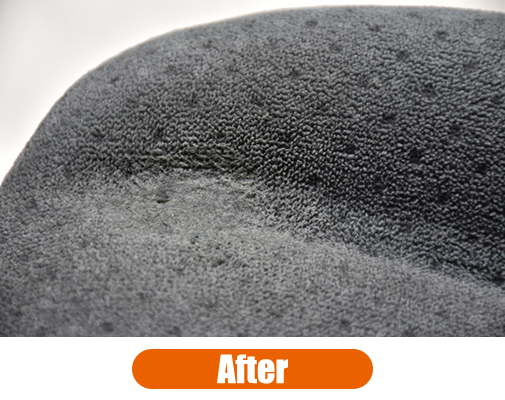
シート補修
![before](http://fuji-garage.com/wp-content/themes/fuji/images/sheet_before.jpg)
![after](http://fuji-garage.com/wp-content/themes/fuji/images/sheet_after.jpg)
うっかりやっちゃったシートの焦げ穴。
インテリアリペアでリーズナブルに直します♪
シートの焦げ穴補修手順
![手順1](http://fuji-garage.com/wp-content/themes/fuji/images/sheet_order1.jpg)
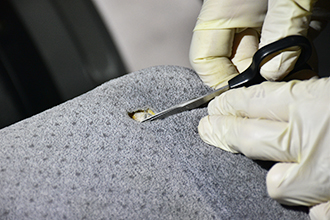
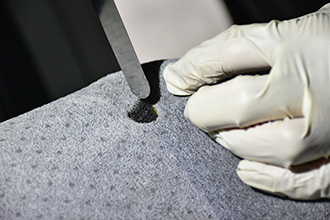
1.施工箇所の状況を確認し、コゲ部分を切り取り周囲をキレイにします。
![手順2](http://fuji-garage.com/wp-content/themes/fuji/images/sheet_order2.jpg)
2.補修スポンジを埋め込み下地を形成します。
![手順3](http://fuji-garage.com/wp-content/themes/fuji/images/sheet_order3.jpg)
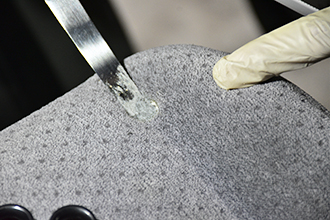
3.専用のファイバークロスと接着剤を混ぜ、パテを作り形を整えます。
![手順4](http://fuji-garage.com/wp-content/themes/fuji/images/sheet_order4.jpg)
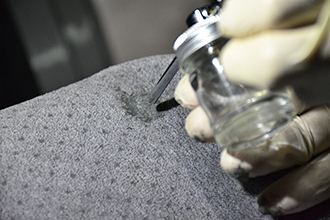
4.生地の色に合わせファイバークロスを調色して、補修箇所に吹き付けます。
![手順5](http://fuji-garage.com/wp-content/themes/fuji/images/sheet_order5.jpg)
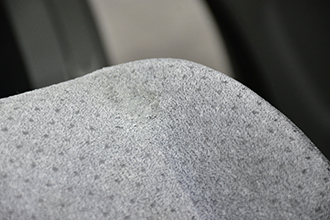
5.生地の目を合わせ質感を調整して、乾燥させて完成です!
料 金 |
---|
1ケ所:¥4,320(税込)2ケ所目以降:+¥2,160(税込) |
施工時間:約1時間 |
※出張修理も承ります。(コンセント電源をお借りする場合もございます。)
※黒、ベージュ、ブルー系素材は常時在庫あり。その他の色はお時間をいただく場合がございます。
※布、モケット、ファブリック生地であればソファーなど車のシート以外も修理可能ですのでお問い合わせください。